Table of Contents
Reprap 3D self-replicating 3D printer
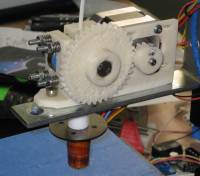
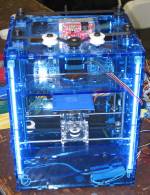
RepRap is short for Replicating Rapid-prototyper. It is the practical self-copying 3D printer shown on the right - a self-replicating machine. This 3D printer builds the parts up in layers of plastic. This technology already exists, but the cheapest commercial machine would cost you about €30,000. And it isn't even designed so that it can make itself. So what the RepRap team are doing is to develop and to give away the designs for a much cheaper machine with the novel capability of being able to self-copy (material costs are about €500). That way it's accessible to small communities in the developing world as well as individuals in the developed world. Following the principles of the Free Software Movement we are distributing the RepRap machine at no cost to everyone under the GNU General Public Licence. So, if you have a RepRap machine, you can use it to make another and give that one to a friend…
Ultman RepRap project
- namespace: reprap:
Hardware
- Hardware: Kartesian Monster (KAMO)
- Mainboard: MakerBot® MotherBoard v2.4, Arduino Mega 2560
- Extruder: MakerBot® Extruder Controller v3.6
Software/firmware
There are two branches of software. One is the original RepRap software and firmware The other one is ReplicatorG based. ReplicatorG has built in drivers and firmware for CupcakeCNC by MakerBot Industries, same electronics as the RepRap.
- Makerbot wiki with links to software repository
Documentation
Links
Things to make
Project Status
10-20-2012 Troubleshooting software
Some hardware upgrades:
- Installed holder plate to better fix the extruder hotend to the extruder
- Leveled the HBP using shimmies made of aluminium tin from coke can, each is exactly 0.1mm thick
Software issues:
- New replicatorG 0037 does not connect to hardware. Had to change the speed in Kamo.xml to 115200 from 38400
- The config file is located in: c:\Programs\ReplicatorG\replicatorg-0037\machines\Kamo.xml
- Loaded new firmware into mainboard, rev 3.5. The upgrade includes speed ramps up and down, nice! The problem is that moves over 28mm are truncated. It is some kind of software limitation, perhaps over maximum number steps per mm. Had to reduce down microstepping on the X and Y axis to 1/2 from 1/10. The new stepspermm = “200”, originally was 1000. Does not seem to be a problem, motors sound a bit different but perhaps the sped ramps are worth the change
Axis properties
| Axis | Software name | Steps/mm | Range | Center |
|---|---|---|---|---|
| X | x | 200 | 145 mm | 72.5mm |
| Y | y | 200 | 143 mm | 71.5mm |
| Z | z | 400 | 64 mm | na |
| Extruder | a |
8-25-2012 Slipping Y axis and Skeinforge tune up
The coupling between Y motor and the ball rod failed again. I had to take apart the whole thing in order to fix it, it must have been like 50 screws! The problem is that the coupler innre diameter is 6.5mm, same as the motor shaft, but the ball rod end has diameter of 6.0 mm. Previously, I used some copper tape to enlarge the diameter of the rod, but it had glue on one sode of it which caused it to be squishy. The result was that the tape got shredded into fine dust after some time and the rod was slipping causing the build to lean on side in Y axis.
This time I used 3 piesed of aluminium from Coke can, 3x 20 mm. I placed them at the end of the rod and pressed the coupling on the rod, sqeezing the aluminium in between. Seems to be holding pretty good for now.
Skeinforge tune up, the endless saga
Feedrate 11.0 mm/s is about the maximum speed, combined with 1.3 flowrate gives pretty good results.
12-28-2011 Upgrade to G4 electronics
The extruder is still not working well. I decided to get and upgrade the extruder front end to MK6 version from Makerbot. That requred the upgrade of the mainboard unfortunately as the extruder uses stepper motor and the new extruder controller does not have the stepper motor driver integrated (why?) While I was at it, I rearranged all the electronics and mounted it inside the back cavity to better protect it.
The major problem was that the Makerbot mainboard that I got was defective!! There were THREE shorts in the Z-axis and the extruder stepper motor connectors. it took me FOREVER to figure it out, because I upgraded all the software and suspected that the sw or fw could be the problem.
List of improvements:
- Upgraded extruder frontend to MK6
- Upgraded mainboard to G4 v 2.4
- Upgraded extruder controller to v 3.6, now using thermocoupler instead of thermistor
- Added safety cutoff switch
- Installed the 28V power supply and all the electronics inside the back cavity
- Replaced PC ATX power supply with smaller 12V and 5V power supply
- Lowered the resistance of the heated build platform to give it more power.
Mainboard PCB Mods
To make the PCB compatible with Kamo original wiring, the following changes were made:
- X-Asis/1 is connected to +5V
- X-Asis/6 is connected to X-Min/4
- Y-Asis/1 is connected to +5V
- Y-Asis/6 is connected to Y-Min/4
- Z-Asis/6 is connected to z-Min/4
Extruder PCB mods
To use the 24V heated build platform, the following modifications were made:
- Cut traces and bypadded pin 5 on X6
- Connect Pin X6/5 to ground next to GND on Q1
The heater is connected as follows:
- Red wire directly to +24V using screw coupler
- Black wire to X6/6
- Black wire 24V GND is connected to X6/5
7-15-2011 Extruder problems
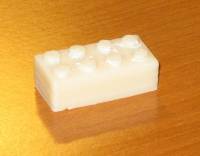 The extruder is down! During the build the thermistor wire become loose and got disconnected from the extruder controller,
the hot end overheated and looked like it is ruined, after cleaning the charred plastic it does not work anymore. Ordered new parts for hotend from Makerbot to build a new one.
After replacing the hot end it does not seem to work much better. The plastic just barely comes out.
What happened was that the extruder lost the grip, the drive rod hobbing got filled with plastic and basic cleaning did not help.
I had to rehob the drive rod and now the extruder works again!
The plan is to upgrade to MK6 extruder, but that will require new MB, new extruder controller with thermistor. The extruder also could use an upgrade, GregFrost did a nice work fixing the Wade's extruder: Hinged Accessible Extruder by GregFrost
6-25-2011 Copying the sw to new computer
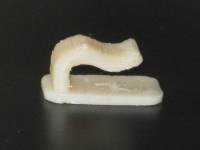 There are few things that are hidden away and do neet to be copied when the software is mover to a new computer. Here is the procedure to setup everything on a new PC:
- Install/Copy ReplicatorG software
- Install Python interpretter
- Copy c:\Users\$USERNAME$\.replicatorg\machines.xml (for win XP the location is: “c:\Documents and Settings\$USERNAME$\.replicatorg\machines.xml”
- Copy c:\Users\$USERNAME$\.replicatorg\sf_profiles or “c:\Documents and Settings\$USERNAME$\.replicatorg\sf_profiles”
11-25-2010 More tweaking of the skeinforge
The extruder works really nice, the best part is that the extrusion speed can be set down to 0 to match the speed of the KAMO machine. Now it will be possible to span the gaps correctly, if I can figure out the Skeinforge settings
Here is parametric table based on the extrusion speed
| Parameter | Top speed (255) | Flowrate 110 | Flowrate 150 |
|---|---|---|---|
| Carve/Extrusion W/T | 1.2 | ||
| Carve/Layer Thickness | 0.55 | 0.4 | |
| Inset/Extrusion W/T | 1.3 | ||
| Fill/Infil Solidity | 0.1 | ||
| Speed/Bridge feedrate multiplier | 1.0 | ||
| Speed/Feedrate | 15 | ||
| Speed/Flowrate | 255 | 110 | 150 |
| Initial height for raftless build | 0.5 | 0.4 | 0.4 |
11-23-2010 New Extruder
Finally printed parts for the Wade extruder. Completed all the parts, Got most of the hardware at the ACE hw store and now to assembly..
Using hot parts from the MK4 extruder. Everything fits well, the only problem is that the motor seems to overheat after about 30 minutes. Other than that it works great!
Outstanding extruder issues
- Unresolved mounting for the extruder controller, right now it is just dangling on wires
- Missing 2x M3x35 screws, using a replacement much longer one, just an aesthetic issue
- Skeingorge configuration
11-17-2010 Hardware work on the drivers
Installing the adapter PCB that interfaces the motor driver to mainboard. So far there are two problems:
- the PCB requires +5V supply but there is not 5V available. The driver needs 5V and the end stop PCB also. I worked around by modifying the mainboard to supply 5V on pin 1 of the 10 pin connector for both X and Y motor cables. Need to be careful to not blow up the power supply when unmodified RepRap motor driver will be connected. There was some intention from them to leave one pin available but it is pin #1 on the mainboard and pin #10 on the motor driver.
- the enable pin is inverted, the MB is outputting /ENABLE and the driver wants ENABLE. need to put an inverter there. For now we will just disable the enable functionality..
6-11-2010 Still Tuning the Skeinforge, problem with skipped M101 codes
Still tuning the skeinforge. After an upgrade to new firmware and sw there is a problem that looks like the extruder is skipping the M101 command to turn on the extrusion. It is completely random. It turns off when it is supposed to during the build, but then it does not turn back on. After some research I found the solution here. Most likely cause is the makerbot's extruder compensate for oozing function. The fix in ReplicatorG 0016:
- go to Machine→onboard preferences→set extruder parameters. There will be an area titled “reversal parameters”.
- set “time to reverse” to 0 and “time to advance” to 0.
This effectively disables the hardware based ooze control and seems to have fixed my particular issue. There is an ufortunate side effect: the PID controller values of heater gets overwritten with some default values from GUI that are completely wrong. The heater will stop working after this. To fix this problem set the PID parameters as follows:
- P: 7.0
- I: 0.34765625
- D: 36.0
After doing this the extruder works correctly.
Ahoj Marketko!
5-25-2010 Upgraded to bigger, 28V power supply and drivers
The speed difference between the extruder extrusion rate and the axes movement is still too great. I decided to swap the motor drivers to mocrostepping motor drivers from Applied Motion Products, model 3540M that I had around. I changed the driver power supply to 28V to gice it more “umpf”. The results:
- Old maximum speed 4.4mm/s (with 12V power and RepRap drivers)
- New maximum speed 10mm/s, this is the maximum speed that sometimes causes skipping, realistically max speed is about 8mm/s, still a worthy improvement
The unfortunate consequence is that the skeinforge needs to be retuned AGAIN.
5-22-2010 Maker Faire in San Mateo
Lots of people around Makerbot, some RepRaps. 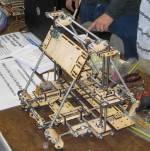
Wade from Reprap projest was showing me his Neema17 extruder. Maybe that should be the next thing to build.
Other things wort mentioning:
- Techzone parts for Mendel
3-15-2010 Tuning the Skeinforge
So it extrudes, but it is a long way to print yet. Spent quite a bit of time on tuning, testing and tuning again the Seinforge. There is a great overview of the process at magetbot wiki. Finally after a day of tuning it prints almost satisfactory. Whay almost? The shotglas that it made still leaks at the bottom. It does need more tuning. But it does look like a shotglas.
3-11-2010 It extrudes!
The next challenge is the extruder. To be exact, the communication between the Reprap 1.2 mainboard and the Extruder controller mainboard. Tried many combinations of firmware. Basiclly the w from CupcakeCNC and Reprap 5D Gcode does not talk to each other over RS485, maybe they us different protocol? I did match the speed I to 38400, that is default for CupcakeCNC. Default for 5D fw is 19200.
At the same time the 5D fw for extruder does not support DC motor, at least that never seemed to work. The heater an temperature readout works but that is no use if we cannot extrude. Eventually I got ReplicatorG GUI downloaded and installed. It has a nice feature of built in firmware download and upgrade. The ReplicatorG crashes a lot or at least stops responding but eventually everything is in place. The Extruder MB talks to mainboard. I can move the stages using the ReplicatorG jog panel. Still, there is something not right in XYZ. The XYZ stages do work for a while, but then after a move the motor starts to whine, nothing is moving but the lights are dimming and the while system stops working. I can disable the motors using the Disable button, then the whine stops and the stages move normally for a bit. What is this?
Back to Extruder, we can talk to it, but the motor just whinges when I st PWM to 200 and set forward direction. It does not move. Maybe it is stuck? I try to dissasemble the extruder partially, connect just the motor to DC power supply and it works, but only from 10V+ that may be the problem as the Extruder MB supplies max 12V. It may work.
Tried to feed a piece of ABS into it but it does not gave any grip on it at all! Some more fiddling, reading the instructions. The idle wheel needs to be adjusted just right for the extruder to work. It takes several tries to get it to work right, there is some room for imprvement in this design I think, it should be self-adjusting, but now the grip on the ABS filament is perfect. The only thing remains: Put everything together and test. Bingo, it works. Here is a picture of the first extrude ever. Good work Gus!
3-11-2010 XYZ stage complete
Long time with no update. Between the moving I was able to machine all missing parts for the XYZ stage and put everything together. Using the Reprap GUI to jog the stages, and test the end stops. The Z stage was especially tricky as there was no original opto-end stop mount. I did rig it together from some remaining parts and it works!
The Z motor mount part was designed and machined from scratch. This was the biggest piece of machining that I have ever done. It works almost on the first try. I just had to deepen the holes for screw heads to have a better grip. What I found out later is that the motor mount screws and the stage mount screws interfere. By tightening the motor mount to Z stage I ruined the two top screws mounting the Z stage to base. It was a pain to get them out. This needs to b fixed in the design. (If it will ever be built again, I mean)
11-1-2009 Moving the stages
Got the mainboard programmed, there is a trick to it but now I got the correct sequence of pressing the Upload button, wait for one line of test in the Arduino GUO text panel and then press the reset button on the mainboard. Timing is tight so even with practice it does not always work.
There is plenty of work on the stages, the endstops need to be moved, some mechanical interference needs to be machined of. I decided to rotate the Y stage to have the motor in the back, out of the way. But then some more machining needs to be done to permit this.
8-9-2009 Assembled the mainboard
Assembled the mainboard (mainboard assy instructions) and one of the motor drivers, unfortunately the ATmega microcontroller comes blank with no sw in it so it does not work yet. We need to program it first with a bootloader so I ordered a miniprogrammer kit http://www.ladyada.net/make/usbtinyisp/ USBtinyISP from Adafruit Industries. It should be here in few days.
8-18-09 Assembled the USBtinyAVR
- assembled the kit
- connected the programmer to RepRap mainboard with the jumper in place to power the board
-
- download and copy Arduino software to C:\Program Files\Arduino
- download and patch the instalation with Sanguino files
- Open the Arduino software, make sure the 'Sanguino' option is selected in 'Boards', and then choose the menu option of “Tools → Burn Bootloader → w/ USBTinyISP”. (if you get a connection error, try to unplug the USBTinyISP and plug it back again
- connect the USB-COM cable, install the FTDI driver
- download the latest firmware for the Sanguino from Source Forge
9-25-2009 Load the firmware and run host sw
- download FiveD_GCode_Extruder
-
- Copy the files cartesian_dda.h.dist, extruder.h.dist, parameters.h.dist, pins.h.dist and vectors.h.dist to cartesian_dda.h, extruder.h, parameters.h, pins.h and vectors.h. These are your local copies that you will configure to your particular RepRap machine. If you are using Linux/Unix, there's a shell script called download-copy that will do all the copies automatically.
- Plug your Sanguino into a USB port on your host computer, then open the Arduino/Sanguino development environment. Load up the file FiveD_GCode_Interpreter.pde. You should get ten tabs: FiveD_GCode_Interpreter, ThermistorTable.h, cartesian_dda, cartesian_dda.h, extruder.h, extruder, parameters.h, pins.h, process_g_code and vectors.h.
- Once you have all the parameters set as you want, compile the firmware in the Arduino development environment (there should be no errors…).
- Then select the Upload to I/O Board button (right arrow) wait 5 seconds and press the Sanguino's reset button just before you do the upload. If you miss the timing you will get error: stk500_getsync(): not in sync:
Host software configuration
- download and install the latest host software for RepRap from Source forge
- Find out what com port is the Sanguino USB connector using (COM9). Then use search to find the reprap.properties file (“c:\Documents and Settings\Josta\.reprap\reprap.properties” ). Right click and edit. Search for Port(name) and change to match your com number. This must be in caps without spaces. Mine for example is Port(name)=COM9. Save the changes.
- connect the motor driver for X axis (do not forget to connect the power connector as well)
- run the reprap.bat to start the host sw
- Click XYZ and click > to jog the motor. The motor should move.
